
Today I put together the first of the 2 earthenware Optimes.
I set up on the dining room table because a lovely thunderstorm was rolling in and I could watch the show and stick greenware pieces together.
First I carefully cleaned and smoothed all the seams on each individual part.
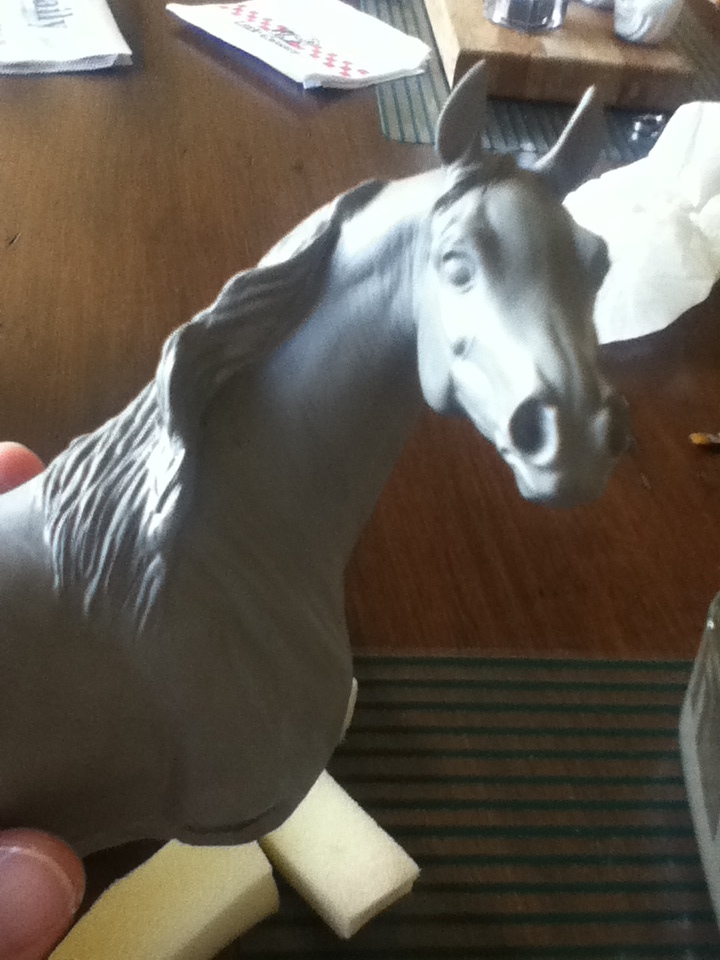
I started with the head and mane piece on the neck.
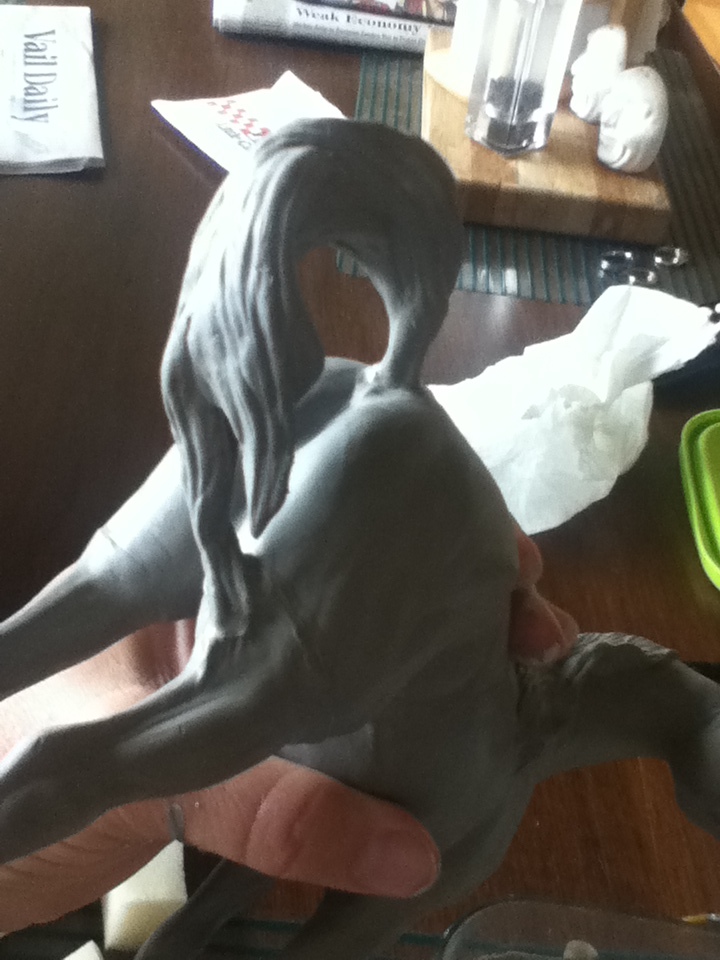
Next the 2 front legs. So far, so good. For the “glue” we use slip of the same batch as all the pieces were cast from. I just paint the limb and the body with slip on the place where they join, and press them together. It’s pretty darn tricky, because the main body is hollow so you can’t grip it very tightly. And those legs are sooooo bendy. I also have to straighten them once they are attached.
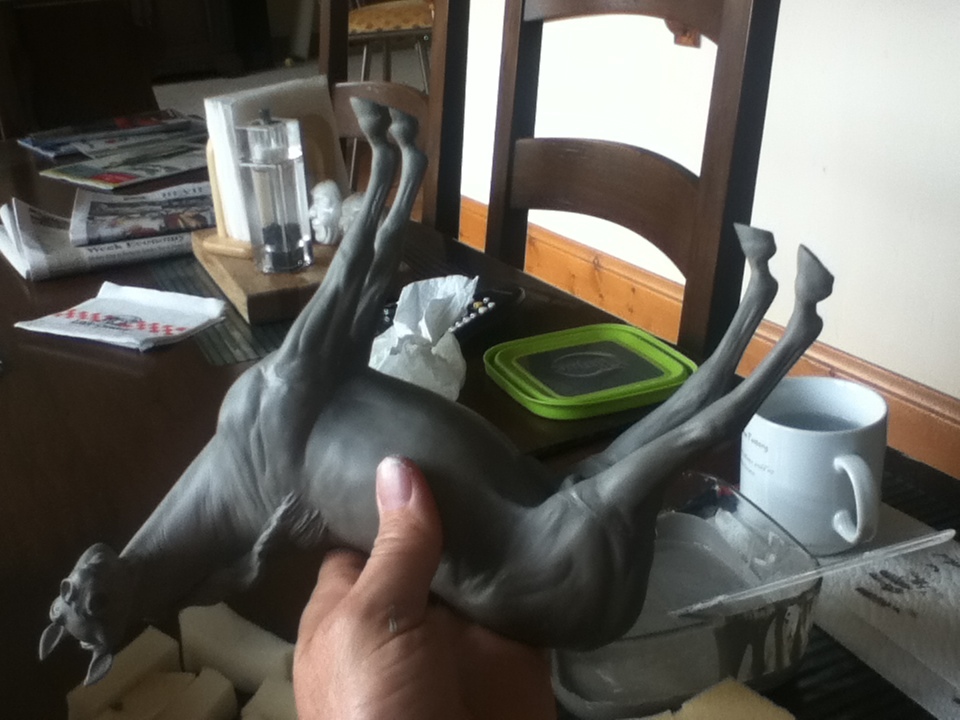
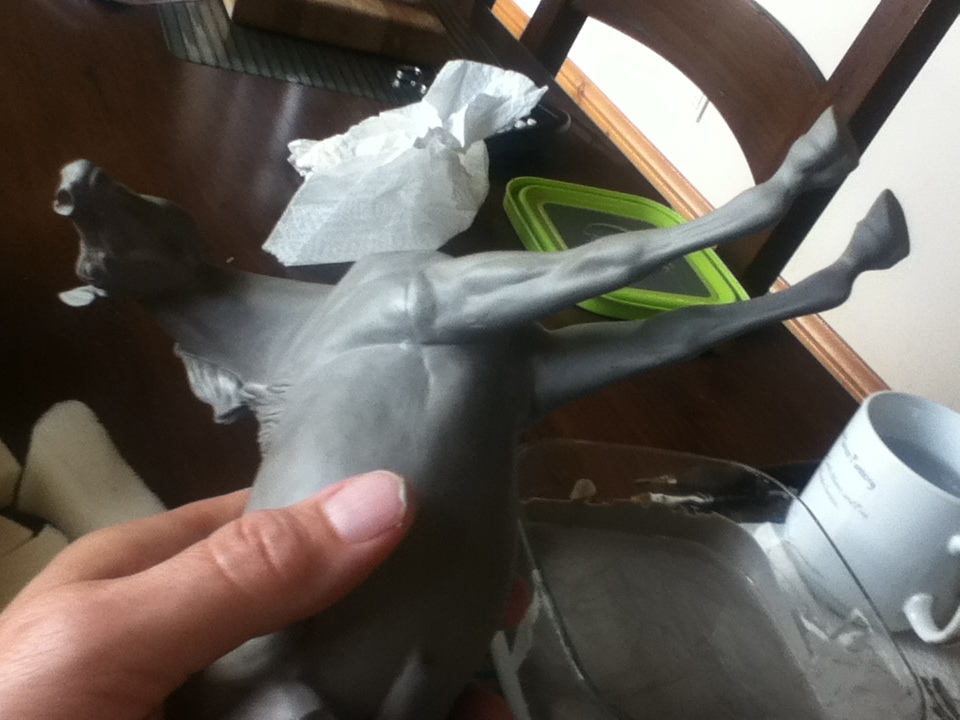
All 4 legs on! I was even able to briefly stand it up to get the hooves flat on the ground.
Last, the tail. Optime’s tail is hideously difficult to get on. It is held to the body by just 2 small parts, the tailbone and the tail tip attached to the leg. Right after I took the above photo, I tilted the horse a little too much to the left and it broke off. I have learned that I only have one more try to reattach a broken-off part. So I painted a ton more slip on each end and stuck it on again. Then I used some leftover cast clay to make a few additional supports to widen the join at the leg. I just resculpted those areas so it looks like a bit more tail there, no problem. I had to hold the horse upright until the whole thing set up and dried.
It held, so for now at least, I’ve got one greenware Optime on the drying shelf!
